Labels

EN FR

Saturday, February 22, 2014

N-scale railroad scenery buildings review

I was looking for some scenery for my board. Scratch building is good and all, but it is time consuming and the results are not always perfects. To mix and match with my already finished buildings, I purchased a few buildings that looked promising from some brands of japanese n-scale railroad accessories (on ebay).

Prebuilt & ready to use


Some of those buildings are ready to use from the box. Just open the box, pull the building and put it on your gaming table ! Great for those that don't have much time. It is not very expensive either...

Bank (Tomytec) about 9$


I think It would be a small structure rulewise. It is of the roughly same size as the smallest buildings in the starter set. Very easy to put together. Painting is ok, architectural style is matching with the DZC background (columns). Very nice piece of kit overall. It needs assembly but it is very minimal.


Small size office building A (Tomix) a little more than 7$


Clean piece of kit, but it looks like a toy. I will have to paint it one day to match the other buildings, but it could prove difficult with all the windows and details. Game wise it could be difficult to place more than 1 ou 2 infantry bases on the roof. Not bad but far from perfect. The price is fortunately very low.

Small size office building B (Tomix) a little more than 9$


Same as model A, larger, taller, a little more expensive. It looks even more difficult to place infantry bases on the roof as there is a large advertisement structure.


Large office building (Tomix) 22$


This would be game-wise a large structure. It is very tall (more than 20cm). It is very easy to hide a large number of units behind. It is of similar size as the largest building of the starter set and makes a very good replacement. The overall look of the kit is very clean and very nice, maybe less cheap that the smaller kit from the same brand (small offices A & B). Very good but quite expensive.


Buildings on sprue that needs assembly


This buildings came on sprue that needed cutting the parts from the frame, gluing them together, and I still need  to do some painting to consider those finished.

Greemax Maintenance Garage & plant factory (17$ each)


Those are two kits but are very similar. One come with 2 buildings (maintenance garage) and the other with only one building and some accessory sprue (pipes, chimneys....). It took me a few hours to build the 2 kits and all the accessories but I am very pleased with the finished result. The factories looks great and the accessories makes a very nice piece of scenery. The factories would be  "normal structures" game-wise. Infantry bases can stand on the roofs with no trouble at all. My favorite kit !


 House Set (6 houses) Greenmax 15$


 In this box there are 6 houses. Those would be tiny structures game-wise. It is a nice change from the starter set buildings even if I still need to test it in game. What I like the most is that it gives a sense of the scale of the game : a bear APC is almost the size of on of those houses ! Good piece of kit, not sure of its usefulness in the game.

 Housing complex (apartment) Greenmax 14$


For 14$ there are 2 buildings in the box. Those are of the same size as the small buildings from the starter set. They look very nice, with a lot of details. The roofs are perfect for placing infantry, and the shape is good to hide units behind. A good kit.


Monday, February 17, 2014

Pathfinder Kingmaker : retour sur une campagne en mode bac à sable

Depuis quelques temps déjà, au club, nous jouons la campagne Pathfinder Kingmaker. La promesse faite dans cette campagne c'est de livrer aux joueurs un bout du monde de Golarion qu'ils pourront explorer à leur guise, puis y établir leur propre royaume. Je vais développer un peu plus mon ressenti par rapport à deux points qui font la particularité de cette campagne : la gestion de royaume d'une part, et le jeu en mode bac à sable d'autre part.

La carte de notre royaume, Erastion, dans les Terres volées, à la fin du Tome 3
Après avoir joué les 3 premiers tomes de la campagne, je constate que la partie gestion de royaume ne m'attire pas particulièrement. Je trouve que cela ajoute beaucoup de lourdeur à nos séances de jeu, heureusement qu'elle est gérée en grande partie par une feuille excel automatisée (et aussi par un joueur qui s'est porté volontaire pour faire le presse bouton...). Je pense qu'il est probablement possible de faire de cette partie de la campagne quelque chose de très bien, mais la mayonnaise ne prend pas.

De l'autre côté, la campagne se joue en mode "bac à sable" : une carte avec des hexagones, chaque changement d'hexagone prend un jour de voyage, puis quelques jours à explorer. Parfois il n'y a rien, parfois il y a une "rencontre". Jusqu'à présent, nous n'avons pas vraiment eu de rencontres aléatoire - ce n'est pas le style de notre MJ : ce sont donc celles prévues dans le scénario écrit. Globalement, ces rencontres sont courtes : il me semble équivalent à un gros combat typique à FP égal au niveau du groupe ou juste au dessus. Or comme généralement ce sera la seule rencontre du jour, les joueurs ont tendance à y mettre le paquet, lancer tout leurs plus gros sorts, etc. Il en résulte un problème d'équilibre, car le niveau de difficulté prévu (en tout cas dans la 3ième édition) est basé sur un système de en moyenne 4 rencontres de FP par jour, ce qui suppose que les joueurs fasse un minimum de gestion de ressources. En gros si le magicien lance tout ses plus gros sorts lors du premier combat de la journée, il risque de manquer de munitions lors du 3° et 4° combat de la journée... Dans Kingmaker, 90% du temps, cette contrainte n'existe pas du tout car une fois l'hexagone en court terminé, il faudra de toutes façon une journée de voyage pour aller au suivant.

De plus, comme le groupe est libre d'explorer la carte d'un tome de la campagne dans l'ordre de son choix, qu'un tome couvre globalement 2-3 niveaux d'expérience, il est possible de faire des rencontres au niveau de difficulté assez variable : nous avons déjà eu le cas où en fin de tome nous avons eu des rencontres très faciles (groupe niveau 9, rencontre FP6) qui n'auraient pas eu de sens à être jouées. C'est un peu le défaut du mode bac à sable qui ressort là. D'un autre côté, nous ne sommes pas non plus complètement libres : il y a une trame scénaristique qui court dans chaque tome de la campagne, et la "zone de jeu" est limitée dans sa taille. Je me rends compte que la partie exploration libre était probablement ce qui m'attirait le plus et que celle ci n'est peut être pas ce à quoi je m'attendais. Je comprends bien entendu le besoin de limiter le cadre de la campagne à un zone réduite, afin que cela n'empiète pas sur les tome suivants, dont les auteurs sont différents et sont destinés à être joués plus tard.
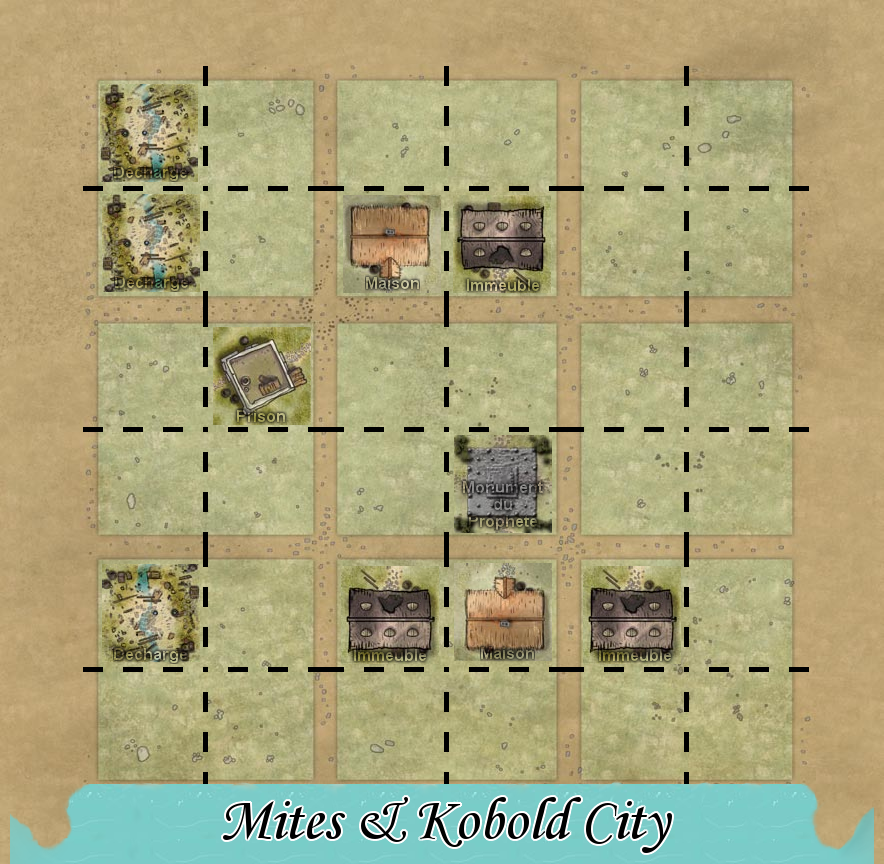
Ma ville préférée : peuplée de Mites et de Kobolds, qui vivent au milieu des décharges...
Je ne voudrais pas que cet article laisse penser que je n'ai pas apprécié la campagne, ou le travail de notre MJ. Quand il s'agit d'incarner mon magicien chétif et pleutre, je me retrouve comme le gamin de 15 ans que j'étais quand j'ai commencé le JDR il y a fort longtemps. Merci à Gontrand, Ménas, Tom le vagabond, Rand Ohm et leurs joueurs respectifs pour tout ces bons moments, j'espère que nous poursuivrons jusqu'au bout l'histoire du royaume d'Erastion ! Sans oublier de remcercier le MJ qui n'a pas terminé de nous en faire baver...

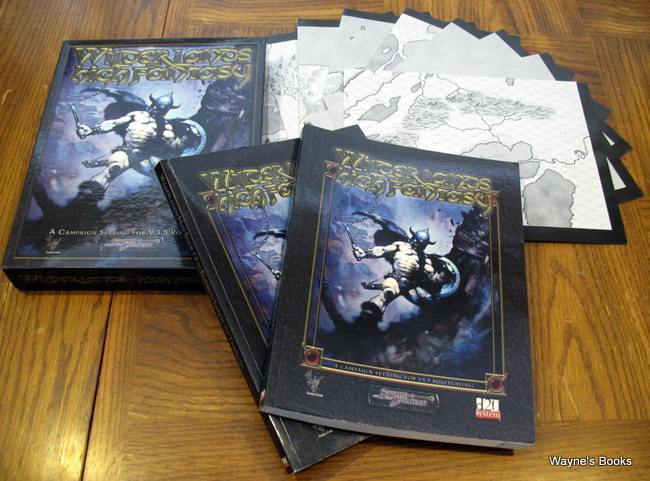
En tout cas cela m'a fait ressortir ma boite de wilderlands of high fantasy. En gros, il s'agit d'un coffret contenant 2 gros volumes et une dizaines de grandes cartes à hexagones. Pas de scénario, pas de blabla, juste des descriptions d'hexagones. Ici un village, décrit succinctement à base de caractéristiques brutes (90% d'humains, 5% de nains etc.,  750po de limite de richesse, PNJs notables...), sur cet autre hexagone une rencontre qui ne prend pas plus d'un paragraphe : un trône de pierre magique, un trésors de pièces d'or éparpillées dans les hautes herbes, une nuée de scorpions géants. Au MJ et aux joueurs de faire quelque chose de tout ça. C'est une possibilité que je garde pour le groupe dont je suis (occasionnellement) le MJ et avec qui nous allons bientôt terminer la campagne Second Darkness.

Un exemple de carte (oui chaque hexagone a un numéro mais tous les numéros n'ont pas quelque chose de spécial).
http://www.judgesguild.com/pdf/lenap/lenap_map.jpg


 Je regarde aussi du côté des générateurs aléatoires. Je pense qu'il est possible, à l'aide de génération procédurale, suivi d'un peu de brodage, de faire quelque chose de très bien (par exemple pour pathfinder):

http://donjon.bin.sh/fantasy/world/

Lorsque je maîtrise Rogue trader, j'utilise un générateur aléatoire de système, issu de l'excellent Stars of Inequity, pour générer un cadre, ensuite je brode autour en ajoutant des choses. Je me suis rendu compte que ma réflexion est plus facile lorsque j'ai un élément de départ sur lequel cristalliser des idées. Dans le passé j'ai écrit des campagnes entières pour mes joueurs. Le plus difficile c'est au début, ça a toujours été de partir de rien, et de tout construire : trouver les noms, le cadre général, dessiner les cartes etc. Cela représente une somme de travail énorme. Avec ce système de génération aléatoire, il est possible de générer cette base. En général je génère plusieurs système avant d'en sélectionner un qui me semble le plus intéressant (en effet le côté aléatoire aboutit parfois à des chose assez moyennes).

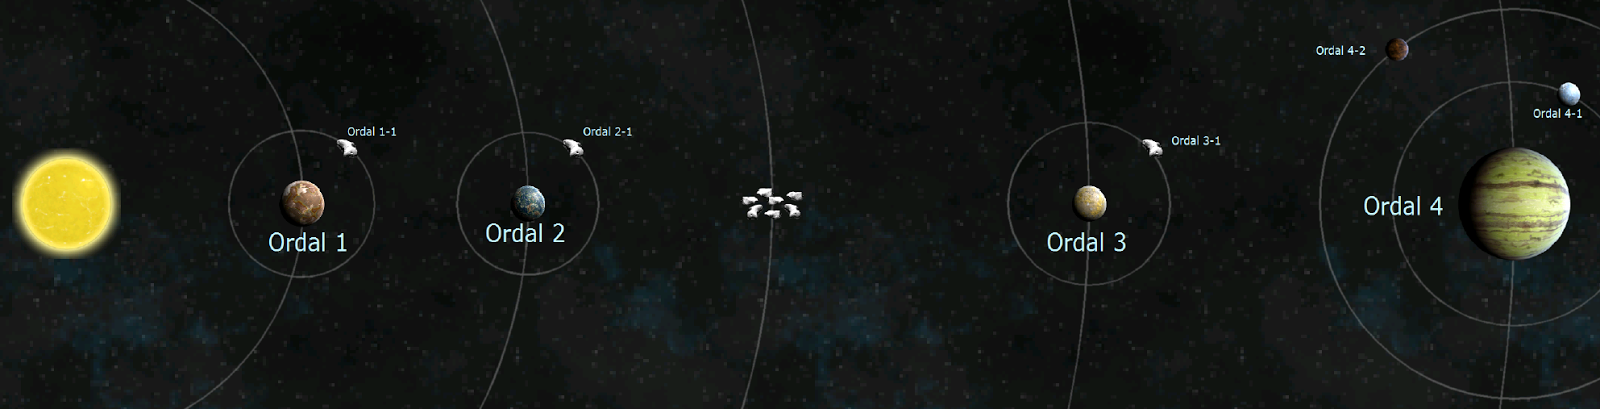
Le système Ordal pour Rogue Trader, généré aléatoirement, et finalisé par mes soins


Sunday, February 16, 2014

Frozen city board : small scenery, Scourge destroyers and razor worms

 Some updates on the work on my frozen city board. I started some tree scenery by putting together foamed PVC and cardboard. I then added some rocks and Vallejo liquid grey stone to establish the base.
 I also got a pot of typhus corrosion and ryza rust in the mail. I immediately tested those on the 1/150 cars and buses. I am very pleased with the results. Typhus corrosion is a very liquid textured paint, the color is spot on for old rust effect. The texture is very fine but works very well, especially when dry brushing ryza rust afterwards. Ryza rust is a very bright orange, like what we could call new rust, and it picks up every details that coul be newly corroded. I have other products to produce rust effects but to this day, typhus corrosion and ryza rust are the best way to achieve that.


I just glued the cars and buses to a piece of plasticard with the help of my miniglue gun (one of my best purchase of last year, very handy !).
 Then I used the scenic shovelled snow from deluxe materials, mixed with 50% PVA 50% water. The finished product should looks like shaving foam. With a old brush, i applied it on the plasticard and the cars. 2 hours later it was completly dried and solidified. Very pleased with the end result.


Later this week I began working on my new models. I really like the destroyers models. They look fierce and tough, very bulky ! I painted them by dry brushing white on a black base color.  I applied the same technique to the razor worms. The guns are chrome vallejo model air, with a generous layer of druuchi violet shade (citadel). I then applied some yellow  (vallejo model air) on the energy parts of the guns. I have still to paint the eyes on 3 of the 4 bases, and maybe spend some more time on the guns and the bases.


 The destroyers posing in front of the tree scenery.

Trying a scenic picture of my Scourge, I will have to wait for a sunny afternoon to have good light !


Sunday, February 9, 2014

Frozen city : snow effect review

 For the frozen city, I decided to cover the buildings with snow. I tried several products on my first building, to decide which one is the best for this. One different product on each side of the building.

1. Army painter Battlefields snow : 
In the pot, it is powdery, and really looks like powdered snow. I applied it by mixing it with PVA glue and water, and then tried to mix it with water effect from vallejo to create icicles. Once dried, it looks good, even if a little to grainy for 10mm

 2. Scenic shovelled snow from Deluxe materials
In the pot it looks like icing sugar. I also applied it by mixing it with PVA glue and water. Once dried it looks less grainy than 1. I think this is the product I will use for DZC and 10mm.

 3. Galeforce 9 snow
In the pot it looks like salt. Once applied, same technique as before, it is grainy and not as white as the previous products. Overall it is the one I like the less.

Saturday, February 8, 2014

Frozen city : large building

 This afternoon I decided to finish a large building I designed a long time ago. I already built the layout, but left it half done for some time. It is almost done, even if I am still thinking about the windows, should I just paint them black and then varnish them with gloss varnish, or should I add some more dividers on each floor ?


the building is 24cm high to the top flat roof, and little more overall. There are 2 doors on the first floor.

Thursday, February 6, 2014

Deathwatch, painting black models

I have a full Ravenwing army and also a small deathwatch force. It is a nice color for an army, but getting the shadows and highlights with black is tricky. Often, the finished model looks like more like painted dark grey, instead of pure black.

A few models I painted before achieving the technique I am satisfied with :


After painting a few dozen models with this color, here are my conclusions :

The trick seems to be in leaving larger pure black areas compared to painting and shadowing another colour (like red, or blue).

The detailed step by step for my painting technique for my latest "black" models :

- black base coat from vallejo black polyurethane (airbrush). I found that the black spray from citadel looks instead like a very dark grey. Before I got my airbrush, I often repainted my base colour with vallejo black when I was using the black citadel spray. Vallejo black is a nice, mat black that I find more deep than the citadel black (but it may be a personal bias).

- very light zenital highlight with vallejo dark grey  model air. It should not be too strong, otherwise it will not look like a black model.

- Edge highlighting of the zenital edges with the following colors (vallejo air model) in this order, from dark to light : dark grey, dark blue grey, blue grey, light blue grey, light grey (almost white). On the smallest areas it should be possible to skip entire steps. The trick is to do this on an area maybe of half the size it would be with another color.

If an edge seems too strongly highlighted it is possible to mute it down with some black wash.

Finished model :